
Design professional, branded mailings to share your documents with ease using TigerMailer. This user-friendly tool makes sure your content reaches its audience in an engaging, polished way.
-
Use your brand colours
-
Send now, or schedule for a later date
-
Track mailings and see who's reading them
-
Create mailing templates
Start a new mailing
-
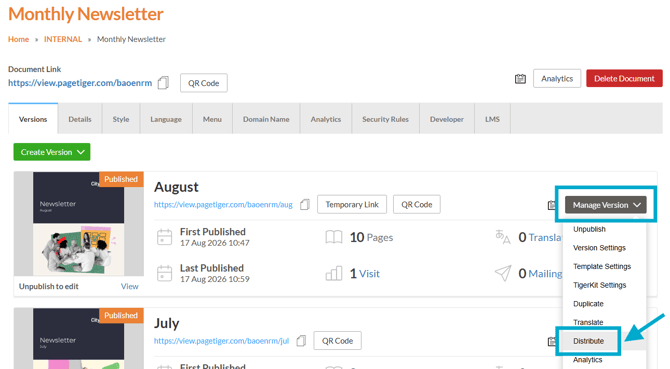
Navigate to the version you wish to distribute.
-
Select 'Manage Version', followed by 'Distribute'.
-
Select the 'TigerMailer' icon.
Choose your mailing type
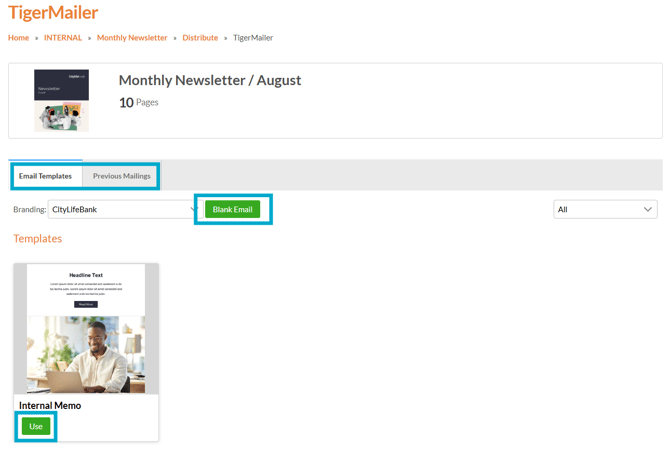
On the new mailing page, choose to create a mailing using:
-
a new blank mailing.
-
a template you have created.
-
a previous mailing you have sent.
- Enter a name for your mailing and select 'Next'.
Choose a clear, descriptive name so you can easily identify your mailing later.
Configure your settings
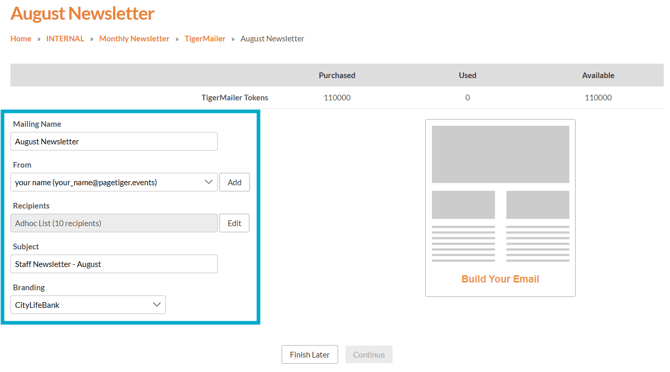
Choose the settings for your mailing:- Mailing Name
The name of the mailing (for internal purposes only). - From
Select who the mailing will be sent from, or add a new email address.- To add a new sender, select 'Add' and enter the sender name and email address. Before you can send from this address, it must be validated. A validation email containing a code will be sent to the address, which you can then enter to complete the process.
- New sender addresses will currently send from @tigermailer.com - support for custom email domains is coming soon!
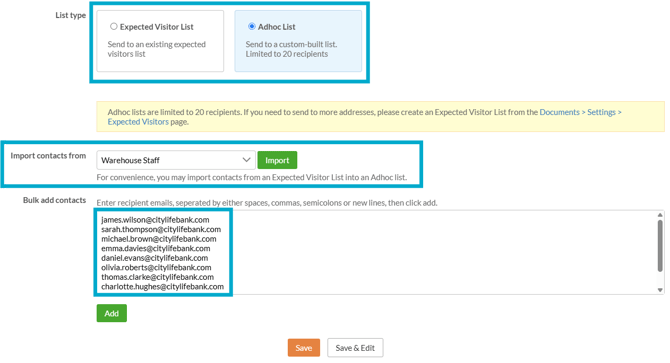
- Recipients
Select who the mailing will be sent to.- Choose from an Expected Visitor List (EVL) or enter a new adhoc list.
- Contacts can also be imported from an EVL.
- Subject
The subject line of the mailing that recipients will see in their inbox. - Branding
The branding you want to apply to the mailing, so it aligns with your organisation.
Design your mailing
Select the 'Build Your Email' icon to start designing your mailing:
-
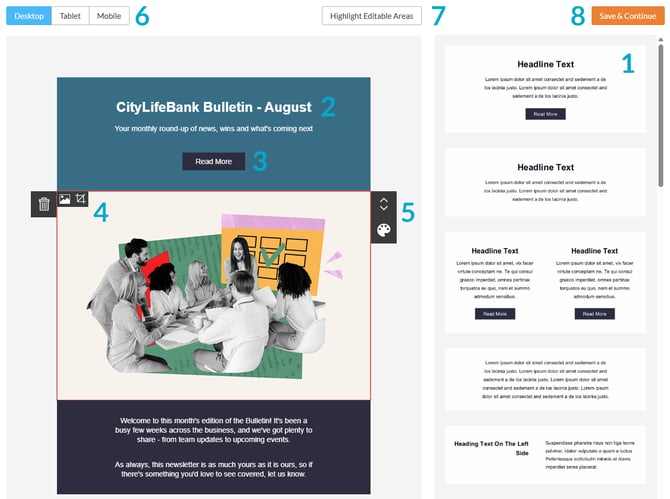
Drag and drop a block into position.
-
Click into a block to enter or edit text.
-
Click a button to link to a page in your document, or an external link, and set the colour.
-
Click an image block to add an image or crop the one selected.
-
Hover over a block to reorder, select a brand colour, or delete.
-
Preview how the mailing will look on Desktop, Tablet or Mobile.
-
See which areas of the mailing can be edited.
- Save any changes, and continue to send the mailing to your chosen recipients.
Send your mailing
Once you are happy with your mailing, select 'Continue' to move to the sending options or 'Finish Later' to save your progress and return to it later:
-
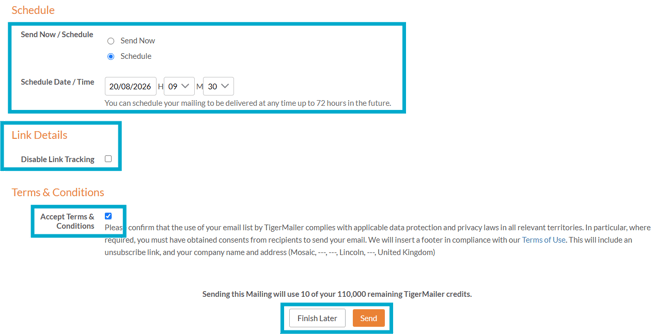
Schedule
Choose when to send the mailing - now, or up to 72 hours in advance.
If the version you are distributing is unpublished, you will be asked to choose a temporary link expiry date.
-
Link Details
Choose whether to disable mailing tracking, such as view counts.
-
Terms & Conditions
Tick to accept to the terms and conditions.
- Send (or Finish Later)
Select 'Send' to send the mailing to your recipients, or choose 'Finish Later' to save your progress and return to it later.
Available TigerMailer tokens are shown on the send screen, along with how many will be used when the mailing is sent.